Project Versioning
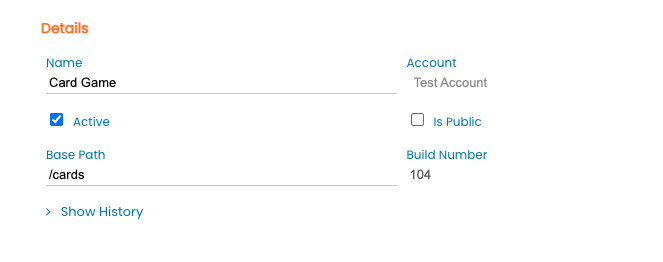
Every time a project is updated in Instalink, a record is automatically created that contains the source code of the project, details about what was modified, the user who made the adjustment, and the time in which the change occurred. These records are known as the project's version records. These records can be accessed at anytime by clicking the "Show History" link found on the project settings page, or in the project table listings.
Managing Project Versions
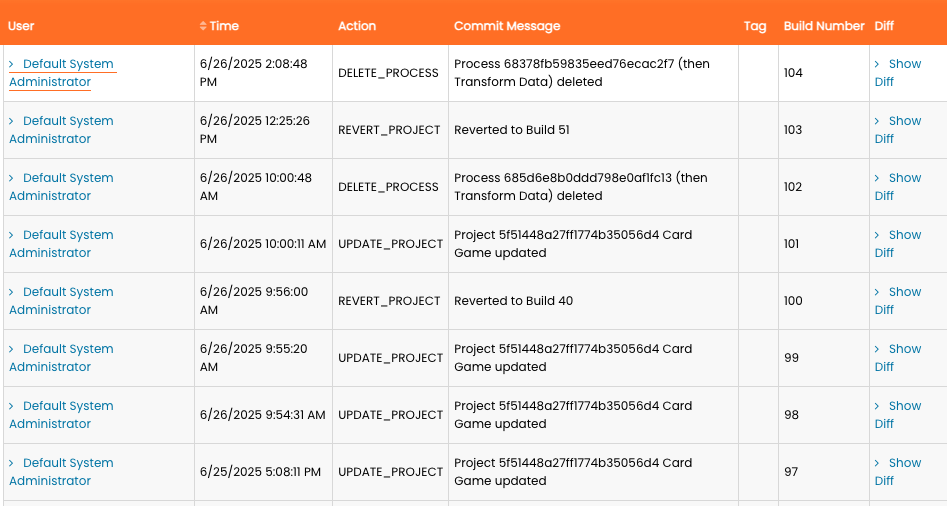
The project's history listing shows every update made to the project. Each version entry contains the following properties:
- User
This is the user who updated the project. - Time
The exact time when the project update occurred. The changes were also deployed to the server at this time. - Action
An enumerated identifier that describes what type of update occurred on the project. - Commit Message
A brief system generated description of what occurred during the update. This may include details such as the specific process that was updated. - Tag
The tag is a user supplied description that can be used to easily identify specific releases of the project. This is useful for being able to revert to an older build of the project. - Build Number
An auto-incremented numeric value. Is incremented everytime the project is updated. Every modification of the project will be assigned a unique build number.
Type of Actions that are Logged
Every update to the project is logged. The actions are categorized as follows:
- UPDATE_PROJECT
Indicates that one or more project settings have been modified. Could also indicate a mass update such as when the project source code is edited directly. - UPDATE_PROCESS
An individual existing process action has been modified. - DELETE_PROCESS
An individual process action has been removed from its data flow. - ADD_PROCESS
A single process action has been added to the project. - INIT_PROCESS
The project has been activated. This can indicate the initial creation of the project, or when a previously deactivated project has been reactivated. - TERMINATE_PROJECT
The project has been deactivated. All contained data flows are no longer operational on the account. - REVERT_PROJECT
The project data has been rolled-back to a previous version of the project.
How to Tag a Project Version
It is highly recommended that every definitive release of a project be given an appropriate tag. This will ensure that future reviews of the project history can more easily make sense of which updates were considered to be important. Examples of a definitive release may include when a project has entered user-assisted testing, or perhaps when the project code has been finalized and has been released to the production environment. All major revisions to the project should also be tagged.
Applying a tag to a project version is very simple. Select the project version record that needs to be tagged and type in a descriptive label in the "Tag" field. The tag field is searchable and will enable users to easily find this version of the project in the future.
Viewing Project Changes
Because each project version contains the exact record of the project source code for that release, it is possible to see exactly what changed on every update that a user makes. To view what changed in a project update, select the desired project version and then click the "Show Diff" link. This will bring up the project diff tool.
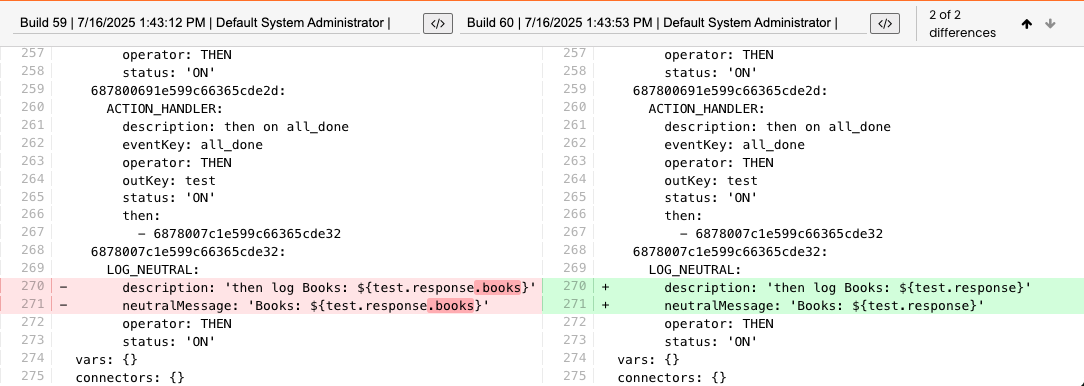
The diff tool will compare the previous version of the project to the currently selected version of the project and will highlight every modification that occurred. The total number of differences is listed in the toolbar and the user may navigate through all the differences by clicking the up and down navigation arrows.
It is possible to do more than simply analyze the currently selected revisions. In fact, it is possible to compare any two versions of the project from any time in the project's history. Simply select the project versions from the dropdowns in the toolbar. The earliest build will always appear on the left side of the diff viewer. Being able to compare any two versions of the project makes it possible to do advanced tasks such as viewing all changes that had occurred on a project since a specific time or since a specific release.
Clicking on the "source code" icons in the toolbar will load the project source code view for that version of the project. Other actions, including reverting can be completed in the project source code view.
Reverting the Project to an Earlier Version
Every project version record contains the source code of the project exactly as it was at the time that the build was updated. To access the source code, select the desired project version record and then click the "Source Code" link. The source code view then appears. At the bottom of the source code view is a button labeled "Revert Project to This Version".
Click the "Revert Project to This Version" button to immediately update the current build of the project by rolling it back to the exact state of the selected project version. This is incredibly useful if there is ever a situation where a recent release is not working as expected, and it needs to be quickly rolled-back to a previous version that was known to work correctly.
A project administrator may revert a project to any previous version at any time. This gives Instalink developers the ability to make changes to projects with security and confidence. Each time a project is reverted it is logged as a new project version in the project history. Reverted projects get new build numbers as it is technically a new deployment of a build. The build number that was used as the source of the reversion is noted in the "Commit Message".
Click here for more details on the project source code specification.